
Time Required: 45 Minutes

Prerequisites Before Starting
-
- Computer with Windows 7 or later, OSX, or Linux
- Java
- Internet Access
- STM32 Nucleo Board
- Any will do but the exact instructions and pins may change depending on your selection
- This course uses the STM32F756ZG Nucleo-144
- USB Cable
- Micro, Mini, or USB-C depending on your STM32 board
Required Tools
STM32 has a few different required tools to get up and running. While it may seem like a lot of overhead at first, each tool serves a unique purpose in the STM32 ecosystem with the overall goal of successful STM32 development.
-
- STM32CubeMX graphically generates easy to understand and edit code.
- STM32CubeProgrammer communicates, programs, and debugs.
- STM32CubeIDE leverages the ecosystem so you can focus on building.
- STM32CubeMonitor records, analyzes, and plots data in real-time.
Installing STM32CubeMX
STM32CubeMX is used to graphically program and configure the STM32 by generating C code. This is really useful because you can see what’s going on “under the hood” and make precise changes as necessary. Something that’s (usually) not possible with Arduino. STM32CubeMX can be downloaded from the website here.

Note: You will need to sign up for a STM32 account to download the software.
Installing STM32CubeIDE
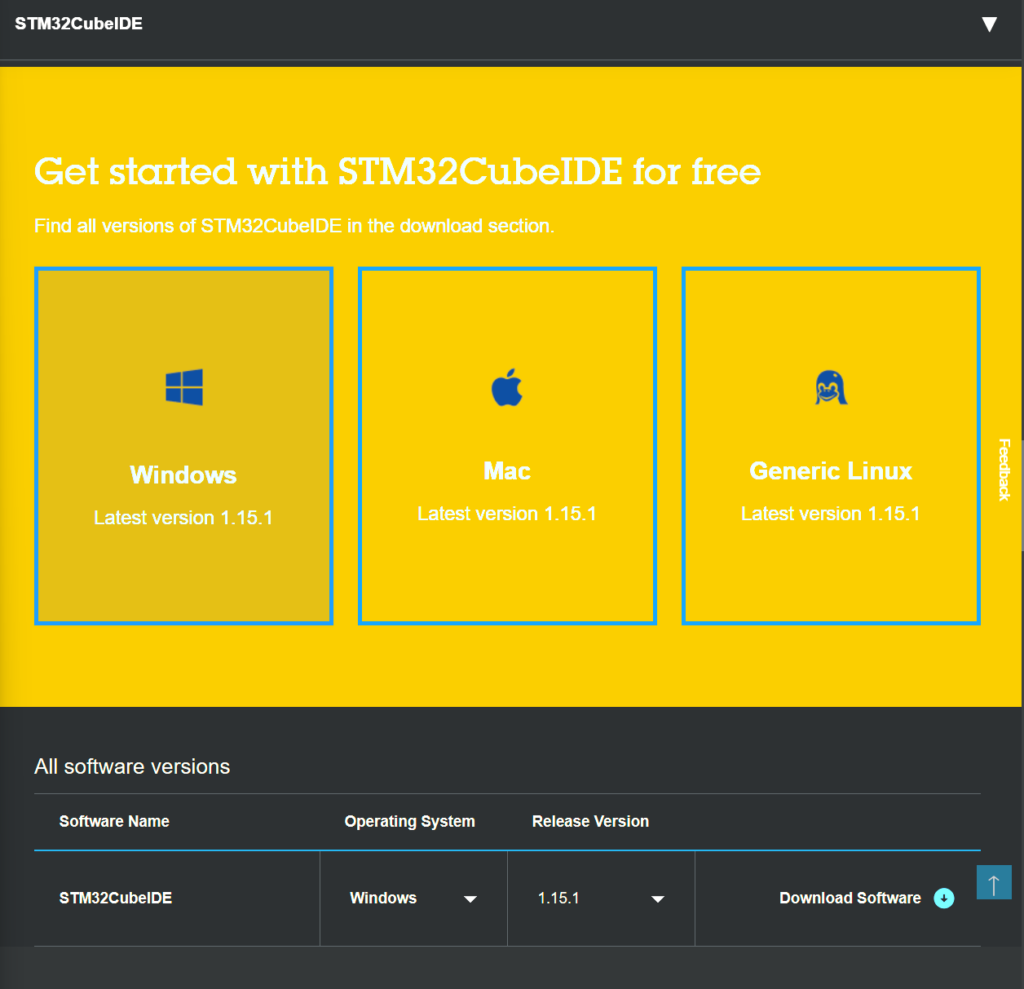
STM32CubeIDE is the IDE or Integrated Development Environment that is used to develop STM32 software/firmware. It is possible to use a different IDE or text editor such as VSCode and generate the code with STM32CubeMX as well. That being said, even though I’m a very hardcore VSCode fan, I’ve found that STM32CubeIDE is the easiest program to use for STM32 development. STM32CubeIDE can be downloaded from the website here.
Note: You will need to sign up for a STM32 account to download the software.
Installing STM32CubeProg
STM32CubeProg(rammer) is used to load/spy software in STM32. The software also includes the USB Driver and can be downloaded here.

Note: You will need to sign up for a STM32 account to download the software.
Installing STM32CubeMonitor
STM32CubeMonitor is used to fine-tune applications at run time through data analysis and visualization. It also provides a flow based editor to quickly build custom dashboards with widgets such as plots and gauges. The software can be downloaded here.
Note: You will need to sign up for a STM32 account to download the software.
Installing The STM32CubeMX Firmware Package
To start developing with your STM32 processor the firmware package must first be downloaded in STM32CubeMX. The firmware package needed will be STM32 followed by the first letter and number in your processor. For example, in this tutorial we will be using a Nucleo 144 Development Board with the STM32F756ZG so the firmware package would be STM32FG
-
- Open STM32CubeMX
- Click on Help > Manage embedded software packages or press
<alt> + u
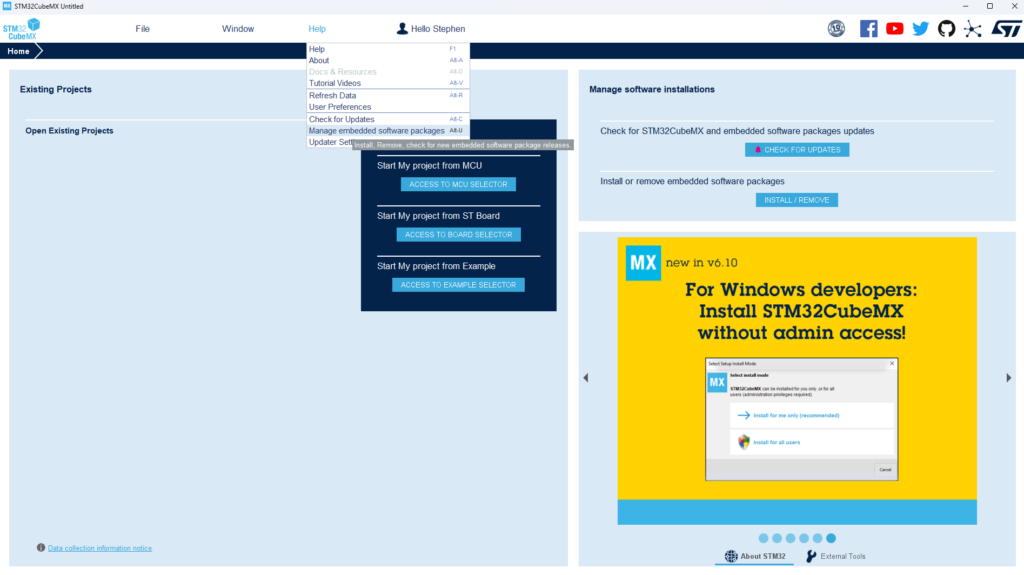
- Select the latest STM32Cube Firmware Package and click Install
- For the STM32F756ZG when this tutorial was written the latest version was STM32F7 Series 1.17
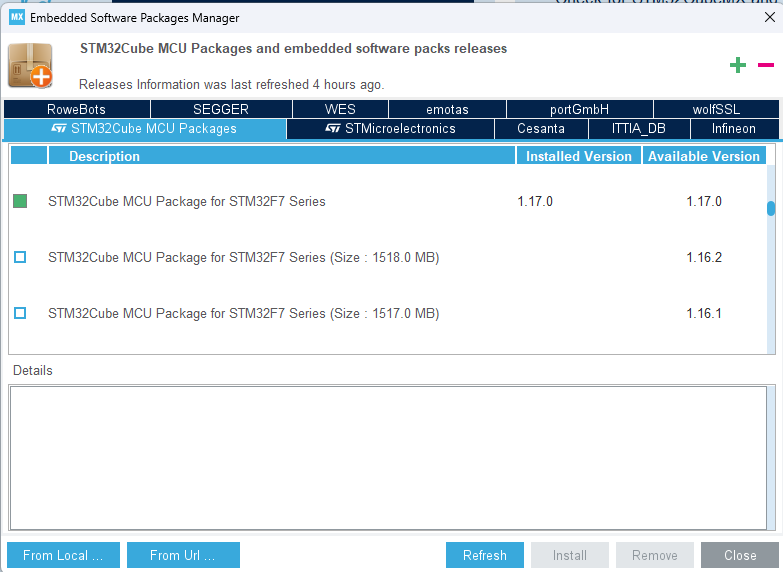
- For the STM32F756ZG when this tutorial was written the latest version was STM32F7 Series 1.17
Run Your First STM32 Program
- Connect your STM32 device to your computer using the USB cable.
- In the case of the STM32F756ZG Nucleo 144 this is a micro USB cable but it may be a mini USB or USB-C depending on the configuration and processor capabilities
- Ensure the CN-1 and CN-2 jumpers are on and the ST-Link driver is installed properly
- Open STM32CubeIDE and select the default workspace.
- Click on File > Open Projects from File System
- Within the window, click Directory and select
<YOUR_STM32CUBE_INSTALL_PATH>\STM32Cube\Repository\ STM32Cube_FW_ <YOUR_STM32_PROCESSOR_SERIES> __Vx.xx.x\ Projects\ NUCLEO-L476RG\ Examples_LL\ GPIO\ GPIO_InfiniteLedToggling This path will vary according to your STM32 processor
- Select
GPIO_InfiniteLedToggling\and accept the popup asking to convert the project into an STM32CubeIDE projectSW4STM32\ STM32L476RG_NUCLEO
- Now the project is under STM32CubeIDE and can be accessed
- Default STM32CubeIDE settings are fine
-
- Click the Debug icon to start debugging
- Ensure to click the “Shared ST-Link” option under Debug configurations > Debugger
- Click Resume to continue the program execution
Congratulations! You are now able to:
-
- Generate code graphically with STM32CubeMX
- Debug an STM32 MCU with STM32CubeIDE
- Find and install STM32 libraries
- Control a GPIO pin to make an LED blink
Great start! For more check out Lesson 2: GPIO