Secure Boot on STM32: What Actually Protects You
STM32 microcontrollers ship with genuine secure boot and isolation features, but most of them do nothing until you configure them. The gap between the datasheet’s promises and a default device is where trouble lives, and closing it takes deliberate setup and a verification step on real hardware.
The Features Are Real but Inert
STM32 parts advertise a serious security feature set: readout protection, a hardware root of trust, a secure boot loader, and memory isolation. Every one of those is genuine and capable. The catch that catches teams is that they are almost all opt-in, and a chip in its default state enforces almost none of them.
That means the datasheet’s feature list describes what the chip can do, not what your device does. The distance between those two is set entirely by configuration, and a single missed option byte can leave a protection enabled in name while a misconfiguration quietly defeats it. The only way to know is to verify on a finished unit.
Readout Protection Is the Floor
Readout protection, RDP, controls whether the debug interface can read flash, and it comes in three levels:
| RDP level | What it does |
|---|---|
| Level 0 | No protection; debug reads flash freely, the default state |
| Level 1 | Blocks debug read of flash; mass-erases if you try to drop it |
| Level 2 | Disables debug entirely and locks the setting permanently |
RDP is the floor because without it nothing else matters: an attacker who can read flash over SWD has your firmware regardless of how secure the boot chain is. Many devices ship at Level 0 because that is the default and nobody changed it, which is the single most common STM32 finding there is.
Check the Protection Level First
Before anything else, read the current RDP level off the unit. It is one command and it tells you immediately whether the most basic protection is even on.
STM32_Programmer_CLI -c port=SWD -ob displ
   RDP          : 0xAA (Level 0)     <- no protection, flash readable over SWD
   nBOOT0       : 1
   PCROP        : disabled
   Secure Area  : not configured
An RDP Level 0 on a production unit means the firmware is exposed and the rest of the security configuration is probably untouched too. That single line frequently sets the tone for the whole assessment, because it tells you the team shipped the chip in its development state.
The Secure Boot Path
Newer STM32 families provide a hardware root of trust and a secure boot loader, often through the Secure Boot and Secure Firmware Update framework, that verifies the firmware’s signature before running it. It is powerful and exactly what you want, but it does not engage on its own: it is a small provisioning project, not a single switch. You generate a key pair, install the public key or its hash, sign the firmware, and configure the loader and option bytes so the chip runs the loader first and the loader checks the signature.
# sign firmware with the provisioned key, then program the signed image
STM32_SigningTool_CLI -bin app.bin -nk -of 0x0 -t fw -o app_signed.bin
STM32_Programmer_CLI -c port=SWD -d app_signed.bin 0x08010000Signing with ECDSA-P256... done Image header + signature appended File programmed; secure boot loader will verify on next reset
Every one of those steps is easy to get subtly wrong, and a mistake usually fails open rather than closed: the device boots fine because the loader did not actually verify, and nothing looks broken from the outside. That silent failure mode is exactly why verification on real hardware is not optional.
Isolation Features
Beyond boot, STM32 parts offer hardware isolation, secure-memory areas, the firewall or secure-area feature depending on family, and PCROP to make a code region execute-only, which wall off secret-handling code and keys from the rest of the firmware. Like everything else here it is opt-in, configured through option bytes and linker placement: used well, a memory-corruption bug in the application does not automatically hand over the cryptographic material; left unconfigured, the keys sit in the same readable address space as everything else.
Verify Secure Boot Actually Engages
The decisive test is empirical: program an unsigned or tampered image and confirm the device refuses to run it. A unit with secure boot truly enabled will reject it; a misconfigured one will run it and reveal that verification never happened.
# flash a deliberately unsigned image and watch the boot result
STM32_Programmer_CLI -c port=SWD -d unsigned_app.bin 0x08010000
# then reset and watch the console / debug status
secure boot: signature check FAILED
secure boot: halting, not executing application   <- GOOD
# vs. a misconfigured unit:
#   application started normally   <- BAD: verification not engaged
A device that halts on the unsigned image is verifying. A device that runs it has its secure boot disabled in practice no matter what the configuration appears to say. This one test separates a real chain of trust from a checkbox someone believed they had ticked.
Confirm Readout Protection Holds
Pair the boot test with a flash-read test, because the two protect different things. Secure boot stops modified code from running; readout protection stops the firmware from being read in the first place. A device needs both, and each has to be verified on its own.
# attempt a flash read; should fail at RDP Level 1 or 2
STM32_Programmer_CLI -c port=SWD -r32 0x08000000 0x40 head.binError: Read operation failed (protection active) <- GOOD # a successful read here means RDP never advanced past Level 0
A failed read confirms RDP is doing its job. If the read succeeds while you believed protection was on, an option byte did not take, and the firmware is exposed even though secure boot might be working. Both tests together give the full picture.
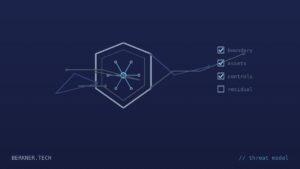
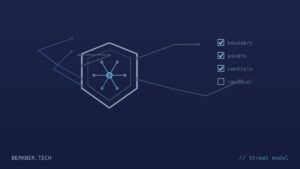
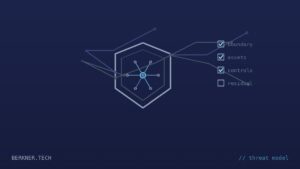
Why Defaults Bite, and the Checklist That Settles It
The recurring theme is that STM32 security fails open: the default state is permissive, the configuration is spread across option bytes and tooling, and a partial setup usually still boots, so nothing forces the team to notice the gap. That is why I never accept the datasheet’s feature list, or the build configuration, as evidence, only a tested production unit. Before shipping, a short empirical checklist settles it:
- RDP at Level 1 or 2, and a flash read fails
- A signed image runs; an unsigned one is refused
- Any isolated key region is not readable from the application
- All of it tested on a finished production unit, not a dev board
Each item is a concrete test with a clear pass and fail. A device that passes all of them has security that is real and verified; a device that was only configured, and never tested this way, is one missed option byte away from shipping wide open while looking fine. The features give you the tools; the verification step is what turns them into protection you can rely on.
Where This Fits
Auditing whether an STM32 product’s security features were configured correctly, and proving it on shipped hardware, is a core part of a product security assessment. If you want your STM32 configuration verified the way an attacker would test it, that is the kind of work we do at Berkner Tech.